Materials matter
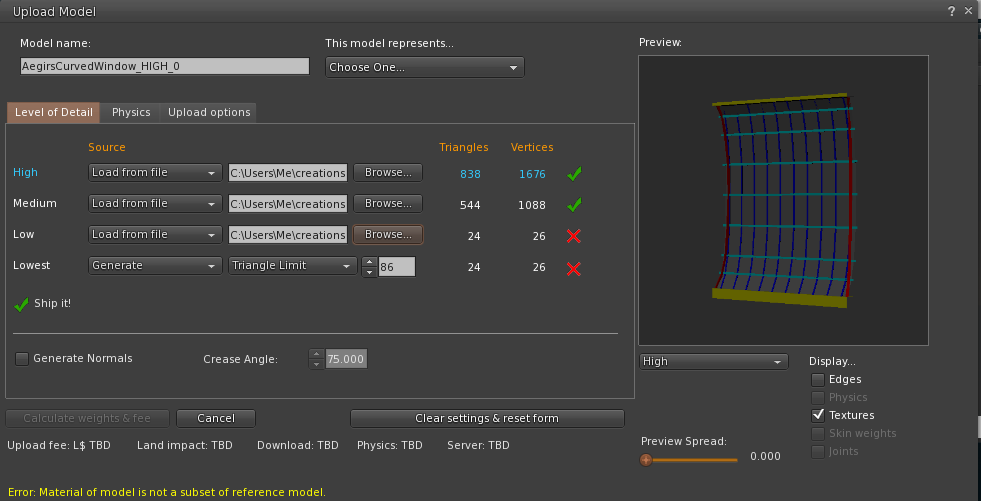
We know from a previous blog that the Mesh that we see is not how SL sees it, instead, it expects it decomposed into a mesh per material. It is in no small part this requirement that leads to the expectation that each LOD model will share the same material set. If you try to upload LOD models that have mismatched materials you will get an error such as this
The nasty yellow "Error: Material of model is not a subset of reference model" is the bane of a Second Life Modellers life, if you are anything like me, that is. Typically this occurs for one of two reasons; the first is that you've just messed up the materials, and you have a mismatch, that is easy to spot (it may or may not be easy to fix). The second reason is the one that, for me at least, is far more common. You've diligently optimised your model, removing all the internal faces that won;t ever be seen at a distance, simplified those pillars and struts and somewhere along the way you ended up with a material that is in the model but has no actual mesh associated with it.
Looking in Blender will show the full list of materials that were used, you'll need to go through each in turn to find out which of them is actually empty.
Gien that our grand tour will require us to cross this small hill on the way to the summit we may as well deal with it. We need to parse our object into materials before we can go much further, so let's count the polygons in each LOD as we go.
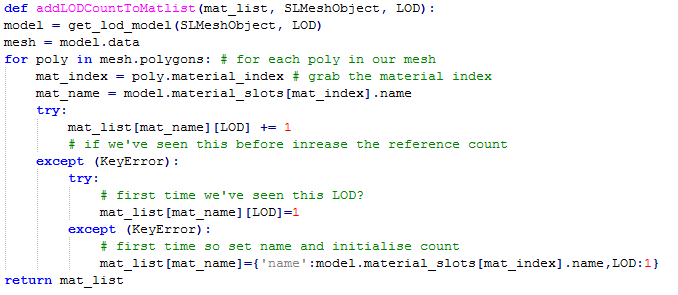
In Blender the mesh data has a list of polygons and each entry in this has a pointer to a material index the refers to the "material_slot" of the parent object. We can, therefore, write a short set of routines that will process the models that we have, building on the previous work that allows us to associate objects together as the LOD models and produce a composite report on the materials used by our LOD models and any errors that we find.
In my first stab at this, I used the material_index to build the map, and it worked perfectly because the model I was testing against had the correct material slots. When I tested with the object used to create the error above the report showed an issue, but it was not the right issue.
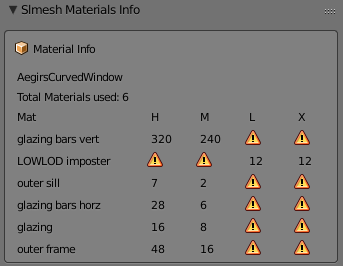
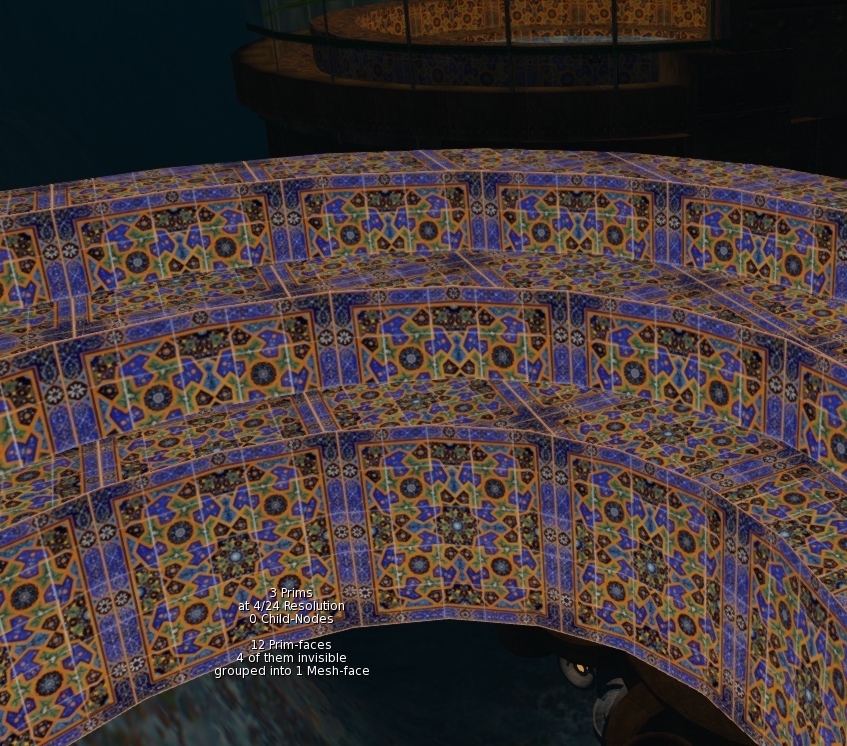
The curved window section above will be featured in another post, one on mesh optimisation and the lower LOD models are not complete because they (deliberately) do not have the same materials, but of course they do all have index 0. It is not the index that counts it is the material inside and given that the materials are kept per object, we need to use the name, not the index.
Having corrected that bug, we now find that we can reproduce the error from the SL uploader in Blender but provide more information to the user at the same time.
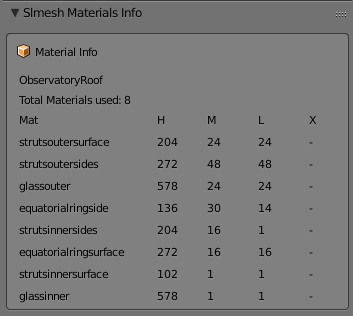
As you can see here, we are still able to show that the High and Medium LOD models are using the same subset of materials but that the LOW and LOWEST are not, what is more, the LOW and LOWEST are in fact using a completely disjoint set of materials, as evidenced by the warning sign in the high and medium LODs.
This is a contrived example to some extent, this is a work in progress and I knew it would not upload but hopefully you can see how the tool has saved a round trip of export and upload.
Another example
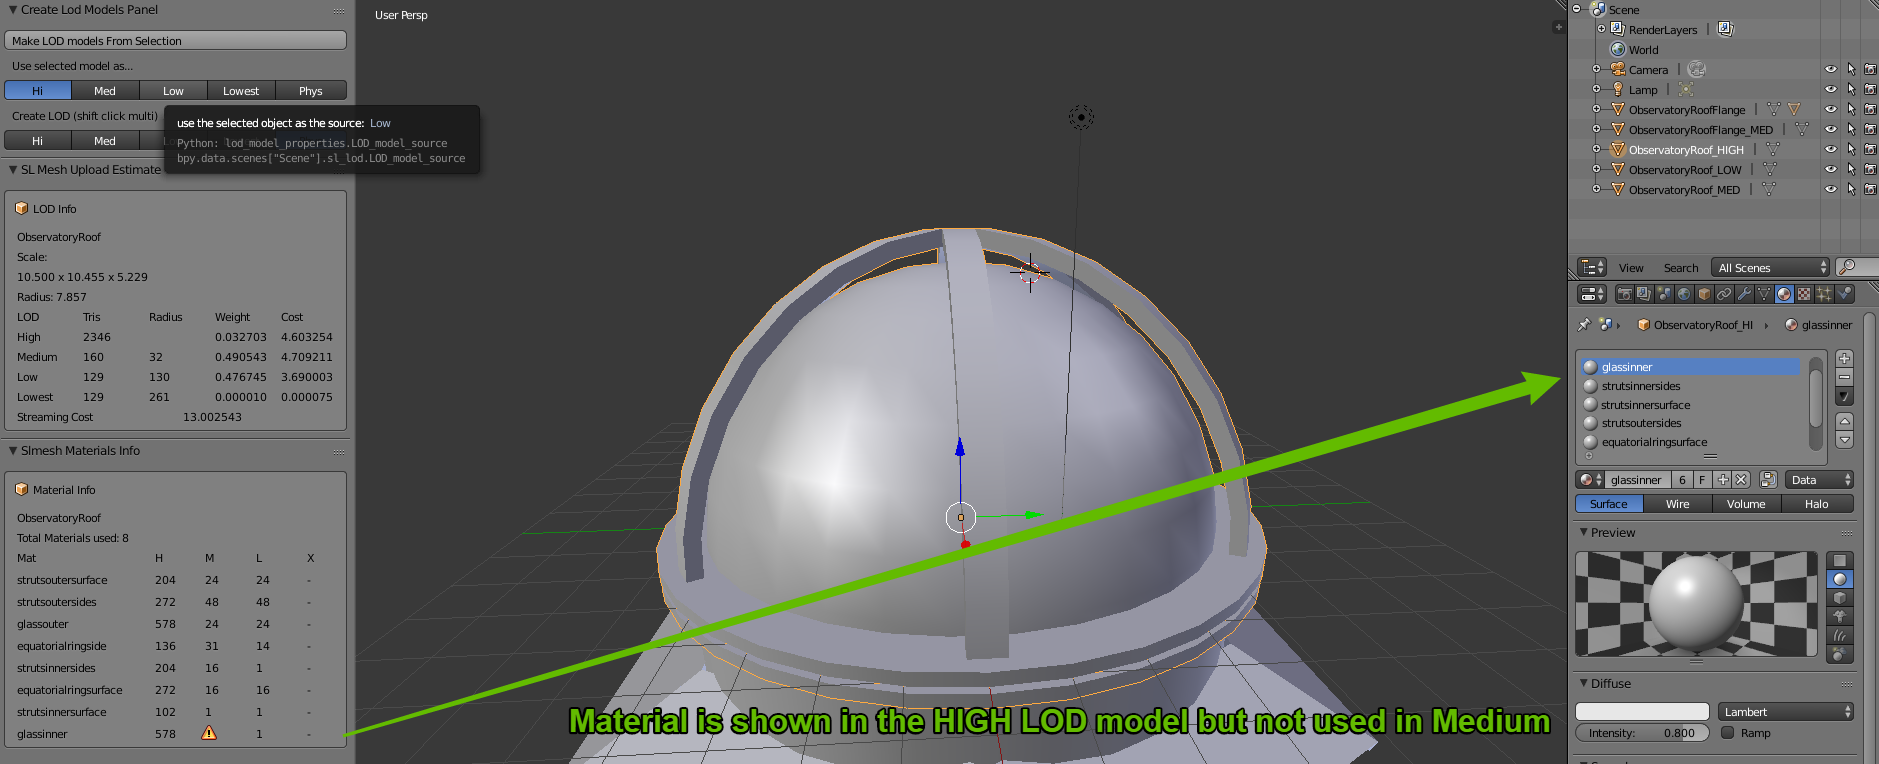
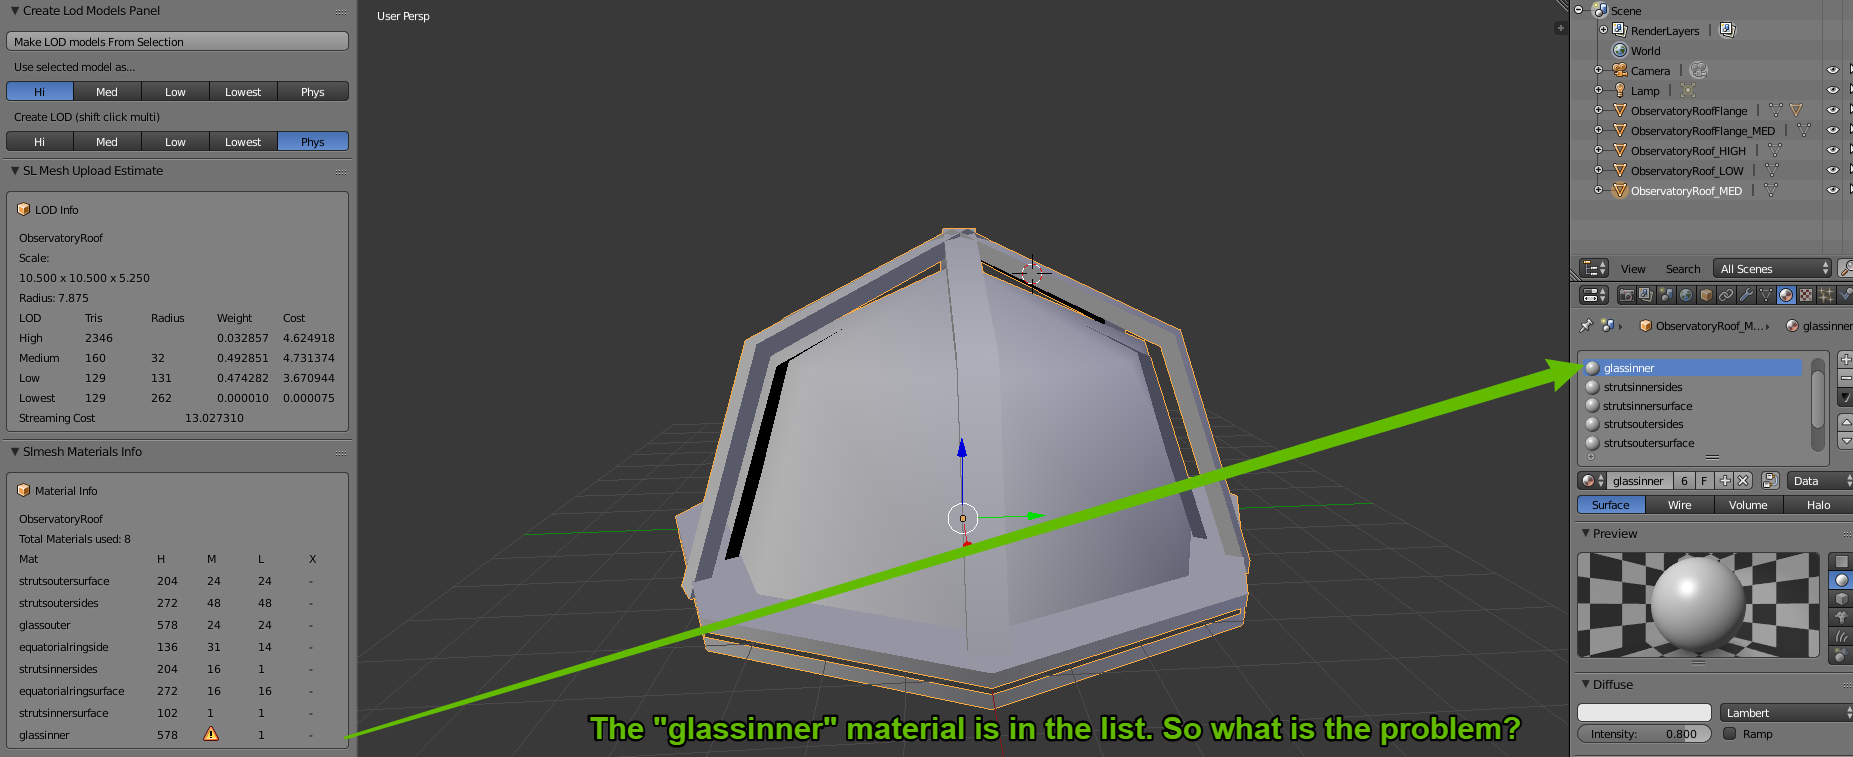
We have used a dome object I have built in the past in previous examples and so I will illustrate how the tool can quickly pin point a material issue and save time.
The first image shows the HIGH LOD model and the report is flagging up an issue with the "glassinner" material in the MEDIUM LOD.
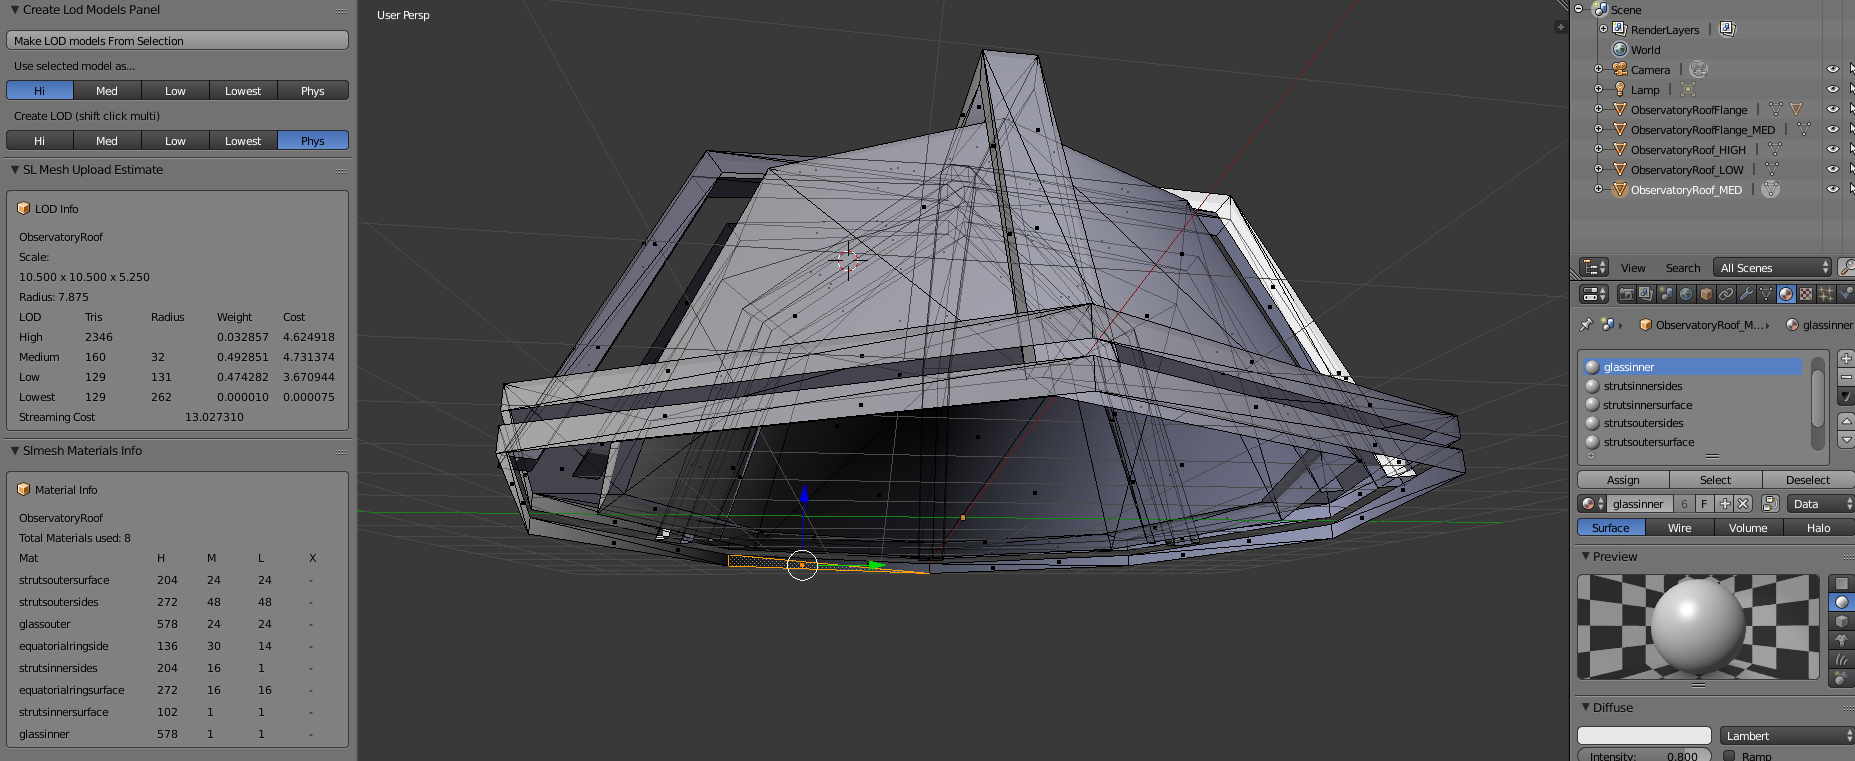
Now we see that the MEDIUM model has the slot in place, so it is not simply that the material is not there. We have to drop into edit mode to uncover the truth. While we were deleting all the interior mesh that would never be visible from in the MEDIUM LOD range, we accidentally deleted all of the "glassinner" and so it is no longer matching the parent. So we can now assign a single triangle in the mesh to this material and it will fix the problem.
|
| One last note, in the final report here on the left, the LOWEST LOD (denoted as X due to the L for LOW) is marked as - and not an error. This is because we have not defined a LOWEST LOD model in Blender and it therefore assumes that you will be generating this upon upload and it does not need to worry about it. Therefore, exporting the HIGH, MED and LOW objects and then importing them wil not give us any material based errors. |
As always, if you find this interesting or think it would be useful to someone please +1, share, whatever else. A typical blog entry here gets about 20 hits, I'd love to reach more people but only if what I am writing is useful.
Love
Beq
x
