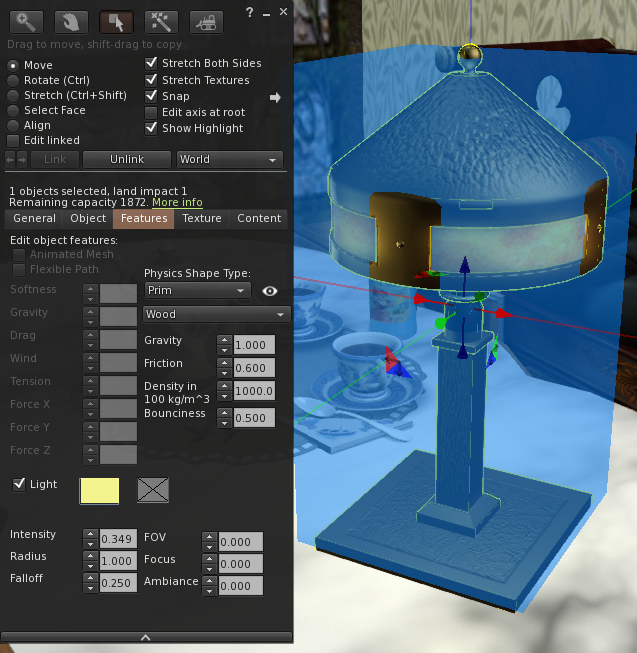
Physics view while editing objects.
Regular Readers of my blog will know that I love the physics view in "Render Metadata" for its valuable debug capability. You may recall that I "fixed" a subtle bug in that which prevented us correctly debugging certain "thin wall" problems and that change will be part of the new release. The debug physics view has a couple of major drawbacks, the first is that switching to it is clumsy and slow, requiring that you have the developer menu enabled, the second is that everything gets coloured whether you like it or not, making it difficult to see what is going on.To address this I have added the ability to show a physics outline for the object that you are editing.
 The functionality is accessed from the features tab in the edit dialogue and is represented by an "eye" next to the physics selection combo box.
 Clicking on the eye will toggle it on and off, showing a representation of the physics shape as shown in the example here.
Once this mode has been toggled on, it will remain enabled when editing subsequent object unless toggled off; it will, however, revert to being off after the next login. This is deliberately done to prevent it confusing users who enable it in error and forget how to disable it.
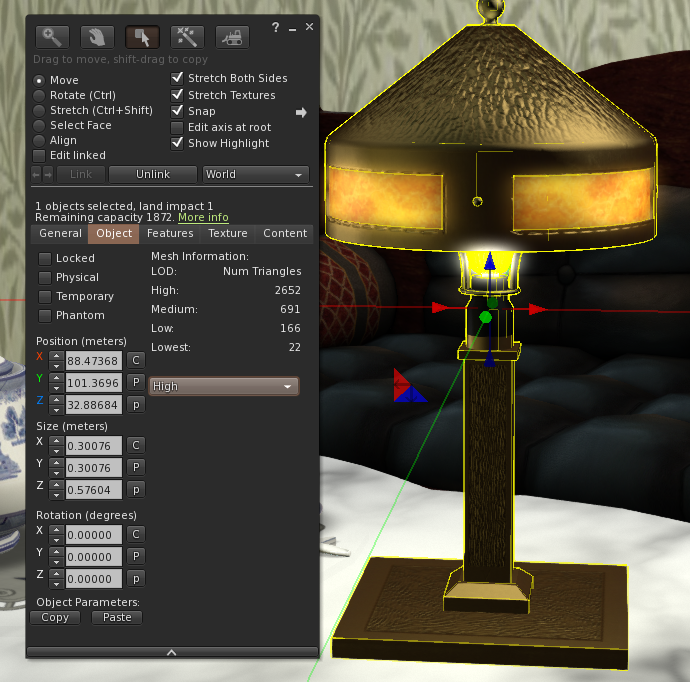
Mesh information in the object panel.
 When you edit an object you will be used to seeing information in the object panel. On the left-hand side, the properties common to all objects. The position, scale and rotation.
On the right-hand side details specific to the type, the hollow, cut and taper etc for prims, special features like dimple and hole size on a sphere or torus respectively. For sculpt maps you'd often see the rainbow hues of the sculpt map texture, but for Mesh, nothing. In fact, worse than nothing because you'd get some greyed out leftover fields.
In the new release, however, I have started to address this and have added a Mesh specific information panel that shows you a couple of extra details about the object and also allows you to artificially see what it will look like at a distance by selecting the Level Of Detail.
What does it all mean?
The new physics mode operates in a very similar manner to that given in this more technical blog from a few days ago. In essence, the shape tells you exactly where your avatar and other objects will collide with the object. The colour tells you when the physics "cost" is very high.
The Mesh info panel tells you how detailed each of the levels of detail in the model are by listing the number of triangles used to make ir, it then allows you to preview the LOD models.
OK, but really, what does it all mean? Why do I care, I don't even build stuff?
For non-builders there are a few notable benefits.
Fix those pesky "stuck LODs"
Sometimes, perhaps you've been cam shopping, taking photographs or maybe even perving on your neighbours, then when you "snap back" to your room you find that your clothes are not rezzing properly. There is now a "simple" fix.
1) Find your inventory window and select the worn tab
2) right click the item, and select edit.
3) Click the object tab, and "edit linked"
4) click the broken item
5) It magically repairs itself
But that's not simple enough I hear you say... We agree and so by the time the new Firestorm is ready for release we hope to have simplified this trick into a one-click fix in the menus courtesy of our lead developer Ansariel.
Why can't I rez on my mesh table/floor/bed.
You know the feeling, you are late to a party, you grab that awesome Gacha "rare" from the reseller on MP. Of course it comes boxed. So you quickly drag it on to the floor....your brain catches up, but it is too slow to stop and your finger releases.... "Can't rez here" says the little pop up. What's worse, your dress is gone and won;t come back until you relog, it may take longer.
We've all done it. Rezzing items can be a little hit and miss at times but did you ever stop and wonder why? The answer is often simply "laziness". Your special outfit just got eaten by the Linden void because the designer of your house didn't give it a proper floor plane. But it is not just floors, chairs and all manner of objects that you might conceivably drop an item on weren't made with a proper physics shape and even though it tries it's best neither the viewer nor the sim can work out where to place your item and ultimately it gives up. Well now you can find out where the safe spots are.
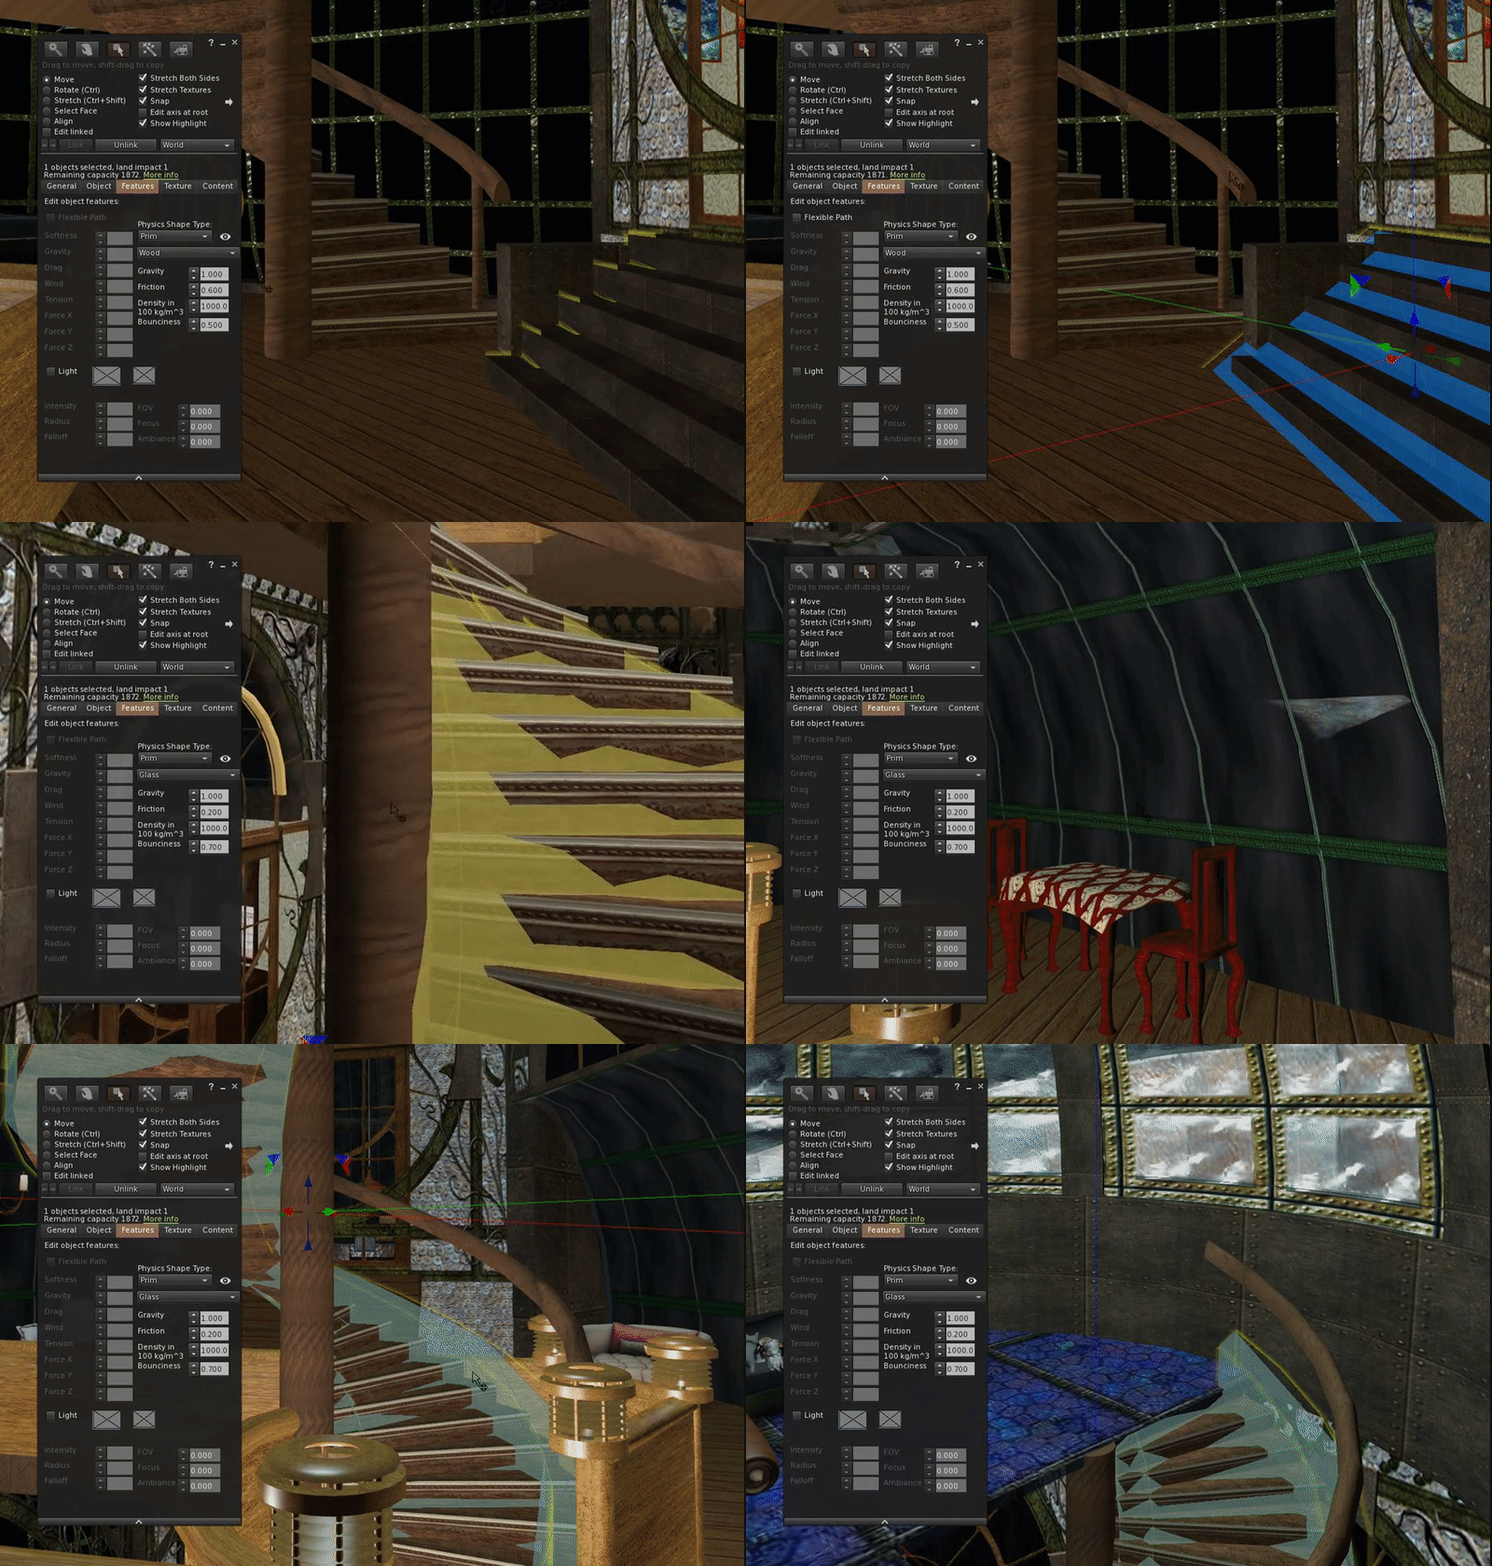
The physics shape view let's you see how the simulator sees the items when it is trying to work out where to place things, where you walk and how things collide.
This short video shows the problem with a simple table (deliberately badly made by me!)
Physics View Mini Tip from Beq Janus on Vimeo.Why do I sink in this floor? Why do I keep falling off the stairs
Of course, physics is used to decide where you can and cannot walk, and even for the non-builder, sometimes it can help to understand why your feet pass through the stairs.

Unable to read blog on mobile due to floating social media share button covering content. :/
ReplyDeleteI'll have a look when I get a chance
Deleteshould be working now Kadah. I junked the whole "share to" stuff, nobody really used it and it had the side effect of making the mobile version less than ideal
Delete👍
Delete👍
ReplyDelete👍
ReplyDeletegenial
ReplyDelete