There have been a few reliability issues with the Mesh Studio servers of late and this has led to much grumbling from the beleaguered users.Mesh Studio is one of a number of inworld Mesh creation tools that allow you to generate Mesh directly from prims. Other tools, such as Mesh Generator, work in a similar fashion (with a similar price tag) but for me MS is that most flexible and easiest to use. But what exactly is it that MS does for us?
I've seen a few articles on the web about the mesh saving/export capability of Singularity, that was later adopted into Firestorm, often they will say things such as "I really don't see what Mesh Studio does that "save as" does not. This blog will demonstrate the key differences.
The problem with "save as"
Save as can be found on the Pie menu in Firestorm (I can't comment on other viewers). The image below shows where it is. For Mesh, always pick "collada".
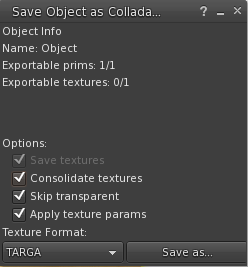
We can then "save as". The default options such as "skip transparent and "apply texture params" should be used.
We can then "save as". The default options such as "skip transparent and "apply texture params" should be used.
The "save as " function literally exports the mesh of the object, it does nothing more. The one exception being the very useful "skip transparent" which will not generate mesh for any faces that are set to be fully transparent.
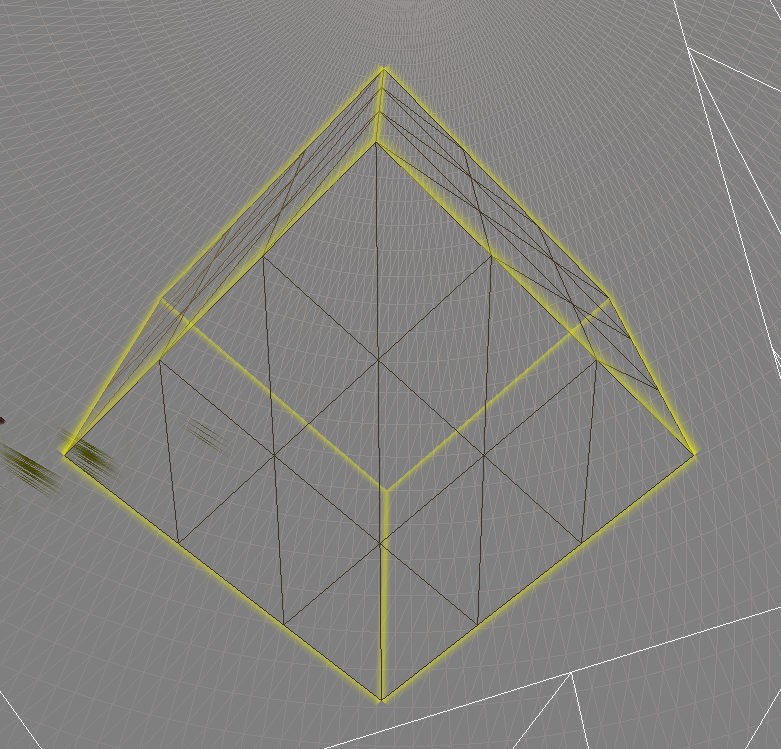
The result for a simple cube is a Mesh analogue of the following inworld image.
As you can see our cube is divided up somethig akin to a rubik's cube puzzle with each straight edge defined by 4 vertices. When theses vertices are triangulated it results in 18 triangles per side, or 108 triangles per prim cube. In most cases, splitting a straight edge makes no real sense. and results in extraneous vertices that add to the overall complexity of our object. Similarly all circles, be they parts of a cylinder or a sphere, are defined as 24 straight edges. By extension a quarter cylinder wedge has its curved edge defined by 6 straight lines.
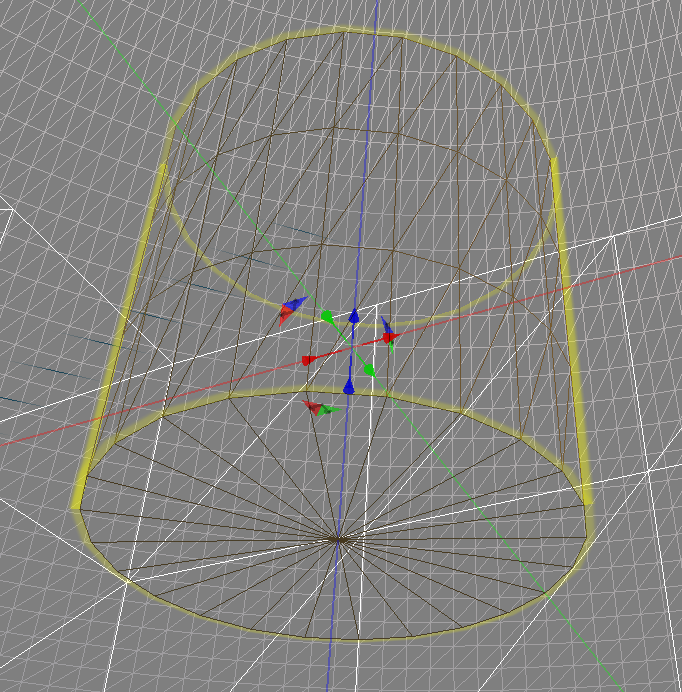
In the image above we see a standard Second Life cylinder prim. The fan of triangles on the bottom shows us the 24 sides of the circular edge and then as we look along the straight sides of the cylinder we start to see the multiplying effect of that "4 vertices per straight" default. as our cylinder now has 24 slices, each consisting of two triangles, multiplied by three, plus another 24 triangles in each of the end caps, a total of 192 triangles. This is not a massive issue if you are using the model as HIGH LOD model and letting the importer generate the lower detail models for you. However, in a build of any reasonable complexity, if you want it to look good you will probably need to make at least a MEDIUM and probably a LOW LOD model. At this point you are going to pay a very high price for those ineffectual extra vertices.
The other, arguanly the largest limitation is that when exporting a linkset, every prim in the link set is exported as a separate mesh object, wrapped in a single .DAE file. Why is this an issue? It is probably exactly what you want it to do, if your objective is to export a prim build as-is but if you intention is to reimport as a mesh then the way that mesh uploads are accounted for has a word or two to say.
As we know, from other blogs I have posted, the mesh accounting has 3 components and the overall effective LI the larger of the three. For the most part we care about the streaming cost and the physics cost, the final member of this triad, the server resource cost is capped at 0.5 per mesh unit on upload (it can change inworld) . The key words in that previous statement are "per mesh unit", If you have a 32 PRim build that you are going to turn to Mesh, and you use "save as", if you do nothing else it will cost at least 16LI as each of those 32 units will be charged 0.5LI.
Mesh Studio to the rescue
Mesh Studio (MS) allows you the option to export things in many other ways. You can control the number vertices in a straight or circular edge, you can ask it to weld all the prims in a linkset into a single mesh object. It supports the "skip transparency" option that we saw in the "save as" but extends this to allow
We can now use our model to generate the Mesh that we want at a complexity that is sensible. In general I never use 4 for straights, I have not found any good reason for it yet. The curve setting is very useful allowing your to make smoother curves that SL default for your high LOD model and then drop to a coarser 16 and even 8 sided curve for low LOD levels.
"But Mesh Studio servers are down and I really need to get this Mesh finished."
The downside of the in world mesh creation tools is that they depend upon external scripts to perform the mesh conversion if for some reason they are not available then the Mesh creation process will fail.
I hear a lot of people complaining about this when it happens, about how their business depends on it etc. and frankly I don;t have an awful lot of sympathy for that position. If you have a business that is important enough in terms of revenue that a day or a week of delayed production is critical then you need to have a backup plan.
You have two real options. The first is to use another inworld service and hope that they are not both impacted at the same time. One slight drawback here is that (as far as I have been able to tell) the functionality of MS is not fully available in any other product, the nearest is Mesh Generator but it does not support a number of advanced MS features such as linked sets or more crucially, arbitrary definition of the complexity (that ability to set any value for the number of circle segments), Mesh Generator in this case does allow changing it but only to pre-defined values.
If anyone is able to correct my understanding here please contact me inworld, as my experience is only through the limited documentation and the demo version.
The second option is to use an off world tool. Choice of these tends to come down to personal experience and in some cases biases but it is also largely about budget. Maya uses swear by the power of their tool, but unless you have access to a student version it is going to cost you of the order of 2000 USD (possibly per annum?). At the other end of the spectrum is the phenomenally powerful, but ever so slightly (very) scary, Blender.
A lot of people find Blender to be impenetrable, and it can be daunting especially if you are used to the very simple and friendly in world tools. However I would suggest that a few very simple commands that most people can manage to memorise will allow you to get close to the same quality of Mesh that Mesh Studio will output, starting from a "save as" output.
The video shows me importing a 110(ish) prim model that I had hoped to generate am MS output from. I guide us through joining all the objects together (bringing the LI down from 55 to 7) and then cleaning up all those extraneous vertices.
So does that mean I don't need Mesh Studio now?
What I hope it has shown you is that Mesh Studio saves you a reasonable amount of fiddling around. It may only have taken a few minutes but consider that you need to do that for every iteration if your source model remains the inworld version. Every time you change the model you will need to clean it up. But there is another issue, that of UV mapping.
Both MS and "save as" do a pretty good job of exporting the UV mapping of the textures, What is less clear is whether that editing survives the clean up process.I most cases I tend to remap the UVs so it is not an issue for me, however I did conduct a test and both the Mesh Studio model and the Firestorm Save As model survived the cleanup commands as shown in the video.
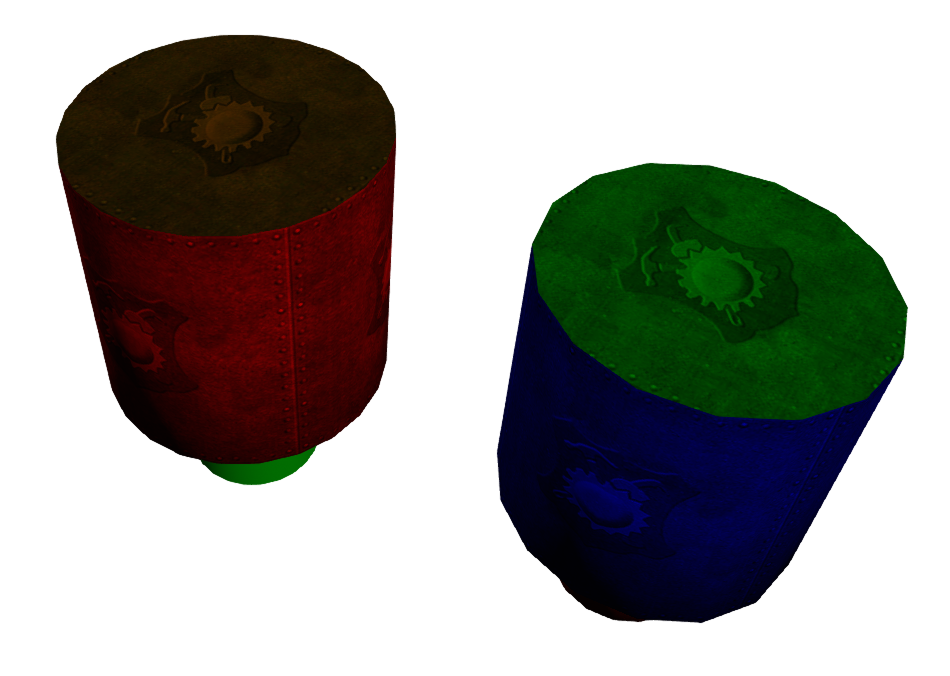
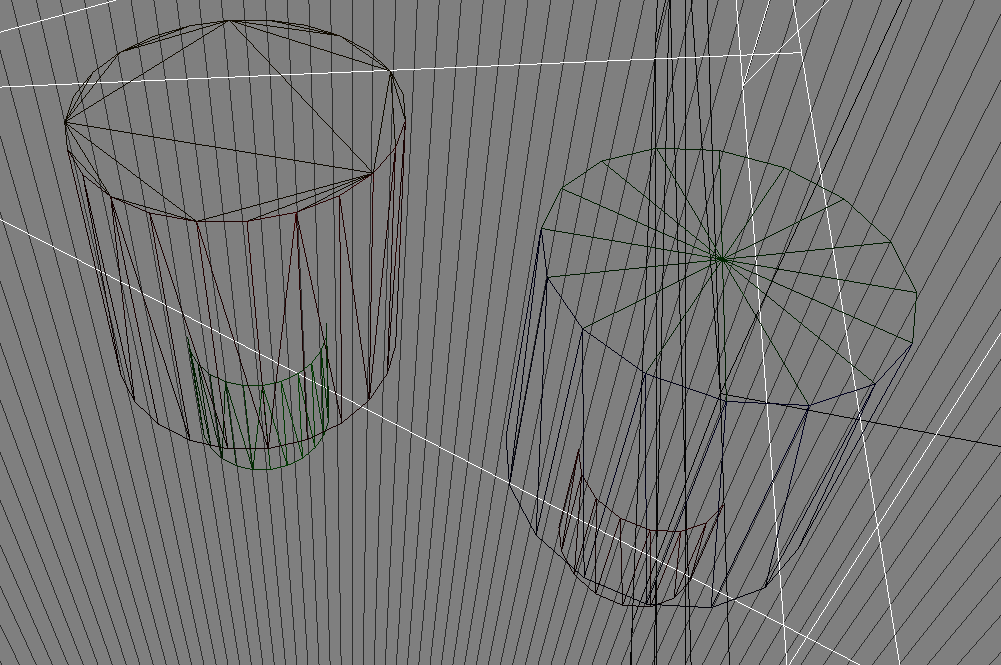
The image above shows the MS export on the right (exported at 16 sides per circle) with the FS save as export on the left. Both were cleaned up using the same method, however, the MS mesh did not have a limited dissolve applied. The net effect of this is that it retained the triangular fan on the cylinder top while the FS export has a rather uglier geometry.
In summary
By using Mesh Studio you automate a number of mesh optimisations that you might otherwise have to do when operating on a round trip workflow from Prim to Mesh. By performing these operations reliably and repeatably in world it makes the process more efficient and of course, for many simple items allows an immediate reimport of the Mesh at a considerable LI saving.
I hope this helps some of you to have a look at how Blender or similar tools can help you out in a fix, but also serves to remind you that the 20 dollars spent on MS was a pretty good investment.
Love
Beq
x