Showing posts with label Horta. Show all posts

Thursday, 20 February 2014

So what are the laws of Physics?

I've been reworking the Mansard Roof on Maison Horta in Mesh. It is currently a sculptie created a year or two back using Sculpt Studio. The challenge is to get the LI low and have a reliable physics profile and resilent LOD. Nothing new there.

Sculpted mansard with sculpted stone dormas
 I detached the dorma and made a prim model using simple wedges for the most part. The final model being 13 prims with 5 distinct texture faces. I generated the Mesh using Mesh Studio and then switched to Blender. 

The Mesh Studio model

I knew that some of my joints were inaccurate, this was in part my sloppiness and in part lack of precision in the shear and taper options. Blenders remove doubles command allows you to merge vertices that are in close proximity and when used sensibly can tighten up all those poor joins.
Blender model - perspective makes the angles look wrong.

The Blender model can be further optimised, by hand editing we can eliminate unnecessary vertices that lie on un-attached edges (such as the top edge) and their associated geometry, the aim as always is to look for new ways to divide up the shape into triangles. Even now there are a few more savings that could be made but I prefer in this case to avoid long thin triangles.
Optimised by hand.
For medium LOD I can use my intimate knowledge of the use of the item to make firm decisions. The interior will never be visible from far enough away to drop to medium LOD, therefore I can cull all the interior faces. I make sure to keep a triangle with the correct material assigned though to ensure we comply with the basic Rule of SL Mesh that all LODs must share the same materials.

For Low LOD, I am going to use the same model as Medium. This will push up my streaming cost but so long as I stay under 1.5 I will be happy, and it will ensure that the house remains good looking for those spectacular New Babbage roofline shots that people love.

And so... physics. The point of this blog. In second life the laws of physics or not so predicatble as those in in real life. I've noticed this in the past but rarely taken the time to explore much. You may have noticed that when you import a Mesh the calculated physics cost in the upload dialogue is close to useless and this is true of both TPV and Lab viewers.

So how do we get the correct balance of physics shape to physics cost?

Given that my next article in Prim Perfect will need to examine physics, I decided to experiment. The first and simplest task was to use the model itself. In this instance it is actually a pretty simple Mesh so we'll see what happens.

Firstly, we specify the model as before and then for physics we select "Use HIGH". We will not touch analyse. As you can see the uploader predicts a physics cost of 0.440. Brilliant. All good then.

Using High LOD model, No analysis.

But when we get it onto the grid and rez it what we find is a different story...
The physics cost is not 0.44, it is nothing even close to that. The physics cost has rocketed to 1.4. It all works nicely though. But perhaps if we were to use the analyze function we'd get better results. maybe that elusive 0.44.

In the screenshot below we see the upload screen. This time we have selected the Analyse option. We are using the Solid method as in general this is best for block builds (use surface for curved builds). In pracatice you can try the 3 methods and see whcih gives the best (simplest) physics that looks right.
The analyse function has returned and told us that the physics mesh has be decomposed into 6 hulls. That seems plausible so we can accept that and go ahead with the import.
another aspect to note however. The Analyse function has pushed our import cost up. It is now going to cost us 13 Lindens whereas before we only paid 11. What is going on?

So now we have imported the mesh with our highly analysed decomposition, surely we must get better results in world....Errr no.

This is odd. We have used the self same mesh and rather than letting the system make some estimate (using an as yet unknown methodology) we have let the Havok system break up the mesh we provided into the most optimal collision shapes it can. The result, our physics cost has rocketted from 1.4 to 2.6 taking our overall LI from a rounded down 1 to a rounded up 3.

If a non-analysed collision mesh can be much lower (in some cases) how does that occur?  you might be tempted to think that the non-analysed collision mesh is inferior. Well it does not seem to be. I can happily walk back and forth through the gaps. But when we take a look at the Metadata view of the physics we see something very peculiar indeed.

Analysed Mesh with physics shape in blue
First, let's look at the physics model generated for the analysed mesh. A nice tight fit, and near perfect match to our physics template. This may be overkill for out needs but we'll come to that later.

Sure enough we can walk through the doors and if we walk into the wall we will slowly climb the slope or walk on the spot on the flat side.
 No surprises at all, physics mesh doing exactly what we expect, and a good job too given how much we are paying for it in LI.

Now, let's take a look at the physics metadata for the non-analysed physics.


Non-analysed mesh with physics in blue
Wait a minute, that's not what we asked for, that's not what we are observing either.
The physics shape revealed by the "render meta-data" option in the viewer is showing us what appears to be a default convex hull. But that cannot be right. I can walk through the doors and collide with the walls with the accuracy of the analysed mesh above, and yet the viewer is telling me that the physics shape does not even know about the doors.

Is this a viewer bug? I have not tried the Lab viewer yet.

trying to walk through with "convex hull" physics
The last couple of images show the difference in behaviour of the same object. Firstly with "convex hull", secondly with "prim". as you can see, with "prim" I can walk through the gap. This is not news... However, the physics shape is the same in both cases, you can clearly see that I am standing "inside" the supposed physics shape

walking through the same model but using "non-analysed" prim physics.


Thursday, 27 December 2012

Getting Physical - Revamping a staircase

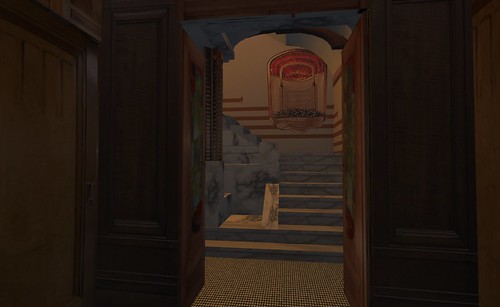
One common feature of late 19th Century middle class urban houses in Europe was the entrance staircase. In the usual manner of design, a kitchen and scullery occupied the streetside of the ground floor, the main reception rooms were therefore on the floor above the street level, the Bel Étage. Not one to conform, Horta took this "standard" and reinvented various aspects. Reorganising the groundfloor to give more space but also making the entry staircase a real feature piece. As one entered the building the double doors were swept open and the visitor was met with a stunning marble staircase lit from above by an ingenious light well, making it both light and welcoming, very different to the darkness often encountered inside the deep set terraced town houses.

It was always important to me to create that sense of welcome, the idea that you were entering something different. Though as in all my earlier attempts skills and tools both left me to make compromises.
This is a photo of the first version of the stairwell. This predates sculpts and is fully prim built. The brass coloured column in the middle is my low prim attempt at recreating the lovely column radiator that Horta installed to take the chill off of the stone stairwell.
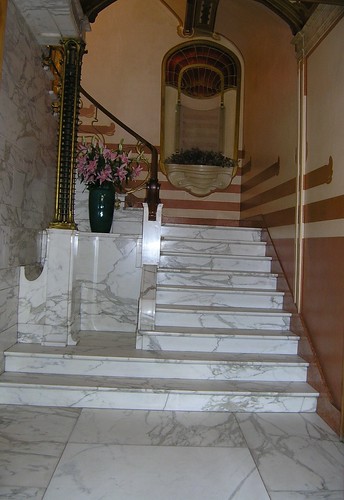
The photo above shows the real life Maison Horta and gives an idea of what I am trying to achieve.

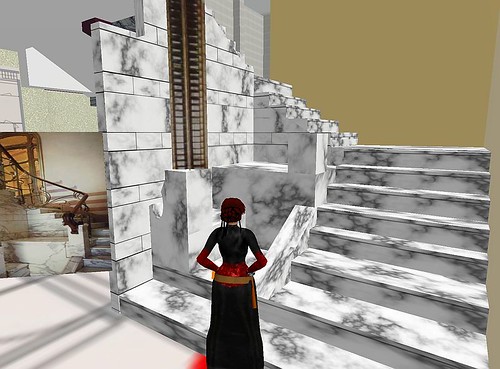
This is how it has looked for the past 3 or 4 years, the only significant change since the 2007 version was to replace the prim built stairs with sculpted ones (a real saving back then!). There are some significant missing details not least of which is the curved marble  detailing that forms the side of the staircase for the first few steps.

Today I rebuilt the stairwell using a combination of Mesh Studio and Blender. Blender was required for the curved marble that could not be produced from prims.
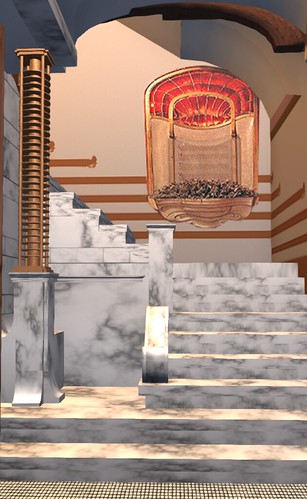
Here we have the 2012 version of the same stairwell. much closer in form to the original now with a proper mesh rendition of the radiator too and crucially, even with the separate meshes for the radiator and the curved marble, it still only incurs a land impact of 5 compared to around 15 for the previous version and closer to 25 for the original.

However the purpose of this blog was not simply to track progress but also talk about physics. There is a lot of confusion over physics in mesh and how to define it, but simply defining it isnot the end of the story either. By default once you import the physics is not actually enabled properly.

The default mesh physics is something akin to taking your object and stretching cling film over it. it will tend to stretch from one extremity to another and not follow the shape you have lovingly crafted. This is what is know as a convex hull. Any mesh when first imported whether you have defined a custom physics model or not appears to have its physics type set to convex hull.
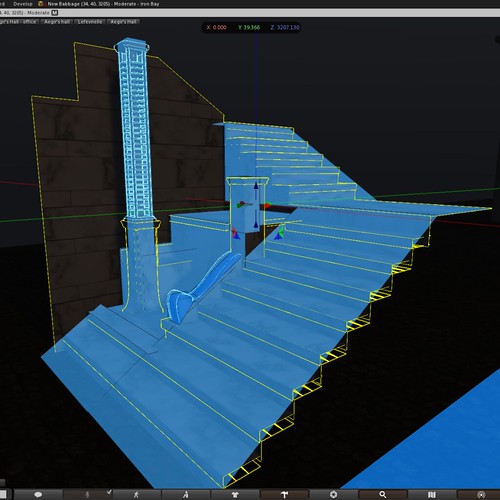
Here we have the finished stair well ready to be deployed. We can use the viewer to help us see what the physics looks like for any given object. Make sure you have the debug/develop menu enabled and then select "render metadata" and tick the "Physics Shapes" option.
In the image above I have told the object to use the convex hull physics. This is selectable from within the features tab of the build menu and is labelled "Physics Shape Type". By default you may see only two options, "convex hull" and "none". As you can see the convex hull drapes itself over the mesh and is far from useful. If you select none then the object effectively becomes phantom and you can use the old fahsioned trick of invisible prims. However, there is a better way.

The better way, is to build your own physics model. Don't worry it is not scary and all you do in fact is exactly what you might have down with a sculpted prim and invisible prims. Create a model that matches the physics you wish to define. the simpler the better as each face will add to the physics cost of the mesh upload and therefore influence your overall LI.
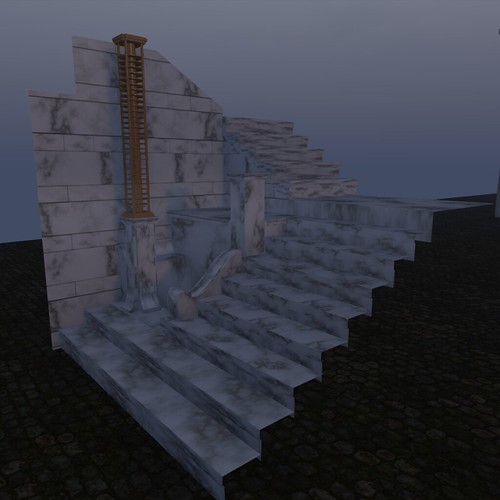
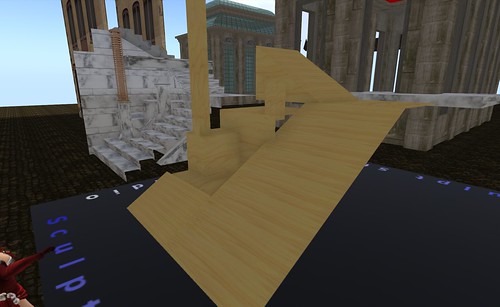
In the photo above I am working on such a model. Note that I am only defining the surface that I want to be "physical", so ramps for the stairs are that bare minimum. I have also chosen to go crazy and define some physical presence for the columns and other decorations. Everything that would never be reasonably expected to be touched by an avatar can be made invisible. Once you have made this model drop the Mesh Studio script into it, set the settings to the lowest level and make your mesh.

The physics mesh is applied at upload time and cannot be tweaked later, it is important (and I discovered this the hard way) to ensure that the bounding box of the physics matches the bounding box of the model. If there is any disparity when the model are overlaid they will no marry up properly.

Now let's look at the results of applying a custom physics mesh using the viewer tools again.
In order to see a custom physics mesh we have to tweak the physics type setting again as before. If your mesh has a custom physics mesh included then you should now have a third option available "prim". This may seem rather obscure and I would agree, however selecting "prim" as the physics type, enables the physics map defined in the mesh model. As you can see the physics mesh perfectly matches the model I made and has been overlayed on top of the visual mesh. The result is nice sloping stair ramps and a few extra details.

Hooray.

I hope this helps a little, to explain the peculiarities of mesh physics.
Be careful mesh can be slippery at times.


Revisiting an earlier project - Chimney stack 2012 and some history

Those who know me inworld will know that my home "Maison Horta" has been around for over 5 years now in some form or other. Over on my flickr account you can find various images from the original construction phase. It was a tough project, I'd never used Photoshop and barely had I joined more than a handful of prims together.

One of the external features that vexed me at the start was the chimney stack. Through limited photographic evidence and drawings I had a good idea what was needed but on a tight prim budget (I had only about 400 prims for the entire build back then) with no sculpties it was going to be ugly. A complex arrangement of varying heights made it costly to reproduce and so I compromised with a two prim construct each textured, and it *was* ugly.

2 years later I gave in to my general concerns about LOD in exteriors. Babbage is often shot as a series of long sweeping rooftop views, I did not wnt to be the one with the large egg on the side of her house but when the use of RenderVolumeLOD debug setting became more common knowledge and practice amongst photographers and visitors this was less of a concern. I built the basic stack from prims using SculptCrafter, the result was a definite improvement but far from ideal, as it always looked a little awkward, catching the light in peculiar ways...

And so it was that the chimney was one of my first ever Mesh projects using the wonderful Mesh Studio. Even before I had a play with the Roycroft lamp featured in earlier blogs I took the SculptCrafter prim buil;t model, ripped the SC scripts out and dropped in the Mesh Studio one. The result was much better, a far neater looking object, with better LOD behaviour and lighting. Being the first project I had undertaken I knew little to nothing about levels of detail, about hidden geometry and about a number of the Mesh specific nuances that I take for granted now. The result was a very acceptable but overly costly (2 LI) and somewhat plain.


Not feeling much like undertaking a large task I decided to re-examine the chimney and see if I could reduce the LI, improve the LOD and add some depth by using fake shadow prims inside the openings.

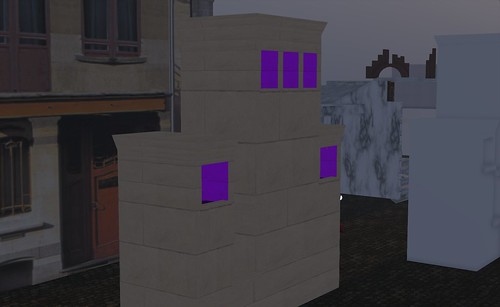
The first task was to dig out the old model and update it. The purple material here will represent the sootier inside faces of the chimneys. You can also see a hint of a black material too. This is a the material that will form the shadow layers.
Shadow layering is an effect I sused in the 2011 RFLSL New Babbage winter city build to add the perception of depth and shadows to the viaduct and other tunnels. The effect is simple to achieve and remarkably effective.
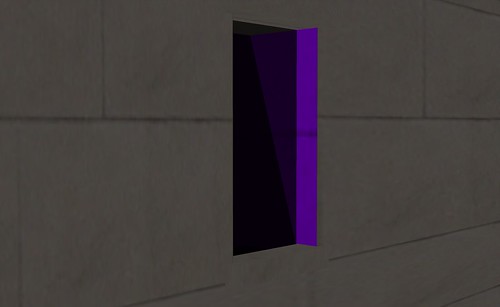
The image above shows the effect a little more. I am experimenting a little here with an angled shadow.
The shadow prim is a stack of semi transparent (I typically use a dark smokey texture) texture faces. In the past I used planar sculpts with each set of four vertices forming one layer of shadow, if each layer is 4% opaque then by the time you stack 10 layers you have a fairly dark (~40%) shadow. In a tunnel, having these layers through the entire length allows you to control how far ahead the user can perceive things making the darkness seem all the more real.

In mesh the same can be achieved in much the same manner. For the sake of experimentation I decided to make it possible to cam down the dark chimney, without the shadows, SL would simply display large empty holes.

Back to the chimney...

One of the issues before was that I had left a lot of hidden geometry in the mesh. Hidden geometry is mesh vertices and surfaces that do not really exist but are a by product of using Mesh Studio and building form prims. Mesh Studio will not create Mesh for points that the fully transparent. therefore, it is a good habit to remove all the hidden mesh faces by making them transparent.

By far the easiest way to do this is to highlight the entire object and make it completely invisible.
The image above demonstrates this. If you look closely (or check the full size image on my flickr) you can see that the Mesh Studio script is tracking my progress and tells me that there are 310 prim faces of which 310 are hidden.
Now, using whatever method you prefer, select visible faces and set their opacity back to normal.
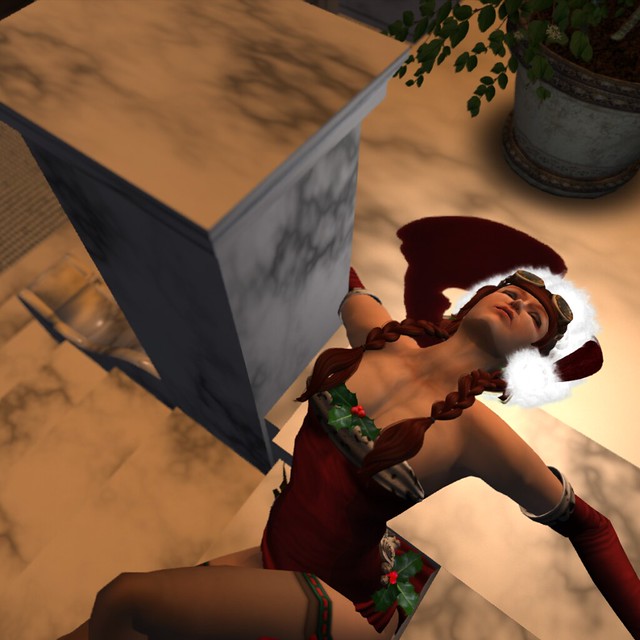
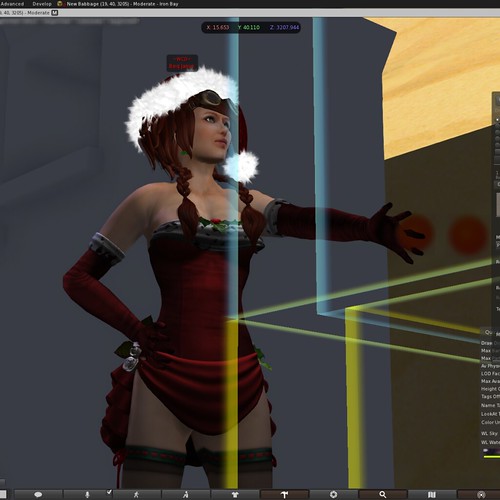
As you can see, just because I am building it does not stop me from dressing festively. I just take extra care not to catch my dress on sharp edges, or spill texture paint on me.

The process can take a while, especially on a complex object. I use ctrl-alt-t to reveal hidden, and then using select face slect a bunch, set them to visible and repeat until I can see no unwanted red.
Here I am part way through the process and the Mesh Studio script is telling us that we still have 248 faces hidden. The more the better, the idea is to only reveal those that absolutely need to be seen.
Once we are finished we can create our mesh and install it.
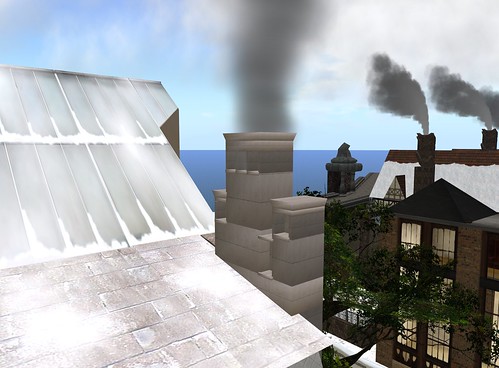
And here we have the Maison Horta chimney stack 2012. It is now reduced to 1 LI and has the improved texturing to the inner surfaces and proper holes you can cam down. Beware of urchins.
There is a 2013 project evident though. the external texture is rather lacklustre, either some more materials to add some variation to the texturing or a fully baked texture are in order...

Have a good New Year everyone.